What is FreeSWITCH?
FreeSWITCH is a powerful, open-source communication platform designed to route and interconnect popular communication protocols such as audio and video. Originally released in 2006, it has been in production for over 20 years and serves as the foundation for some of the world’s largest communication service providers, including Twilio, Five9, and Zoom. Current estimates suggest FreeSWITCH powers communication for over 300 million daily users globally.
Being open source, anyone can download and install the platform. Many enterprises shudder at the words “open source,” but one thing that makes FreeSWITCH unique is that you can purchase support directly from the team that wrote the application, making it ideal for enterprise use. Head over to https://signalwire.com to learn more.
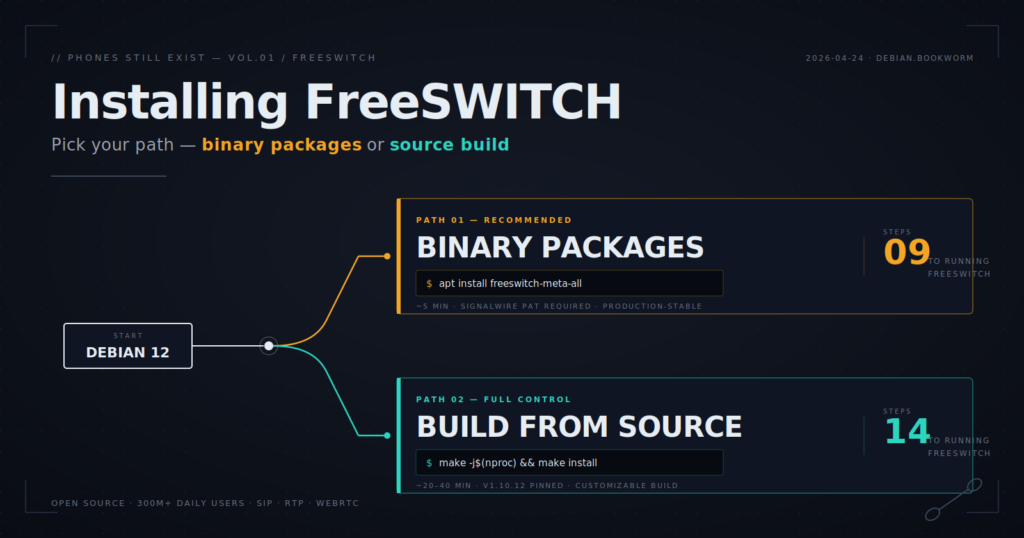
If we’re going to build something cool with FreeSWITCH, first we need to install it. In this guide, we’ll cover two ways to install FreeSWITCH: installing via binary packages and compiling from source.
Note: For these examples, I’m using Debian 12 (Bookworm). As of this writing, binary packages do not exist for Debian 13 (Trixie).
I’ve also created scripts automating the procedures below, which can be found on my GitHub: https://github.com/thevoiceguy/freeswitch_tools
Installing FreeSWITCH via Binary Packages (Recommended)
This is the easiest and most stable installation method for most production systems. It uses the official SignalWire FreeSWITCH package repository and installs FreeSWITCH through standard Debian packages rather than compiling from source. A SignalWire Personal Access Token (PAT) is required to access the pre-built FreeSWITCH binaries, which you can generate for free from your SignalWire account.
Prerequisite — Create a SignalWire Personal Access Token
Before installing FreeSWITCH, create a SignalWire Personal Access Token.
Log in to SignalWire, then:
- Open your SignalWire Space.
- Navigate to Personal Access Tokens.
- Click Create Token.
- Copy the token. It will look something like: pt_xxxxxxxxxxxx
⚠️ Treat this token like a password. Anyone with access to it can authenticate against the SignalWire FreeSWITCH package repository using your account.
⚠️ Be sure to save this token as you will not be able to see it again. If lost, you’ll need to generate a new one.
Step 1 — Become root and set your token
The installation steps require root privileges. The easiest approach is to open a root shell and export your token once:
sudo -i
export TOKEN=pt_xxxxxxxxxxxx
Replace pt_xxxxxxxxxxxx with your real SignalWire PAT.
Step 2 — Install prerequisites
Install the basic tools needed to fetch the repository signing key and configure apt:
export DEBIAN_FRONTEND=noninteractive
apt-get update
apt-get install -y --no-install-recommends gnupg2 wget lsb-release ca-certificates
Step 3 — Detect your Debian codename
SignalWire’s Debian repository is organized by Debian codename, such as bookworm or bullseye. Detect the codename automatically:
CODENAME="$(lsb_release -sc)"
echo "Using codename: $CODENAME"
For Debian 12, this should return bookworm.
Ubuntu note: If you are running Ubuntu, lsb_release -sc will return an Ubuntu codename such as jammy or noble. The SignalWire FreeSWITCH Debian repository expects a Debian codename, so you may need to override it manually:
CODENAME=bookwormFor best results, use Debian 12 directly when installing FreeSWITCH from the official binary packages.
Step 4 — Download the SignalWire repository signing key
Download the SignalWire FreeSWITCH repository signing key. The username is literally signalwire, and the password is your PAT:
wget --quiet \
  --http-user=signalwire \
  --http-password="$TOKEN" \
  -O /usr/share/keyrings/signalwire-freeswitch-repo.gpg \
  https://freeswitch.signalwire.com/repo/deb/debian-release/signalwire-freeswitch-repo.gpg

chmod 644 /usr/share/keyrings/signalwire-freeswitch-repo.gpg
Step 5 — Configure apt authentication
Apt needs to authenticate to the SignalWire repository each time it pulls packages. Create an apt auth file:
mkdir -p /etc/apt/auth.conf.d
cat > /etc/apt/auth.conf.d/signalwire.conf <<EOF
machine freeswitch.signalwire.com
login signalwire
password ${TOKEN}
EOF
chmod 600 /etc/apt/auth.conf.d/signalwire.conf
The chmod 600 is important because this file contains your PAT.
Step 6 — Add the SignalWire FreeSWITCH repository
Create the FreeSWITCH apt source file:
cat > /etc/apt/sources.list.d/freeswitch.list <<EOF
deb     [signed-by=/usr/share/keyrings/signalwire-freeswitch-repo.gpg] https://freeswitch.signalwire.com/repo/deb/debian-release/ ${CODENAME} main
deb-src [signed-by=/usr/share/keyrings/signalwire-freeswitch-repo.gpg] https://freeswitch.signalwire.com/repo/deb/debian-release/ ${CODENAME} main
EOF
Then refresh apt:
apt-get updateStep 7 — Install FreeSWITCH
Install FreeSWITCH and the official module set:
apt-get install -y freeswitch-meta-allThe freeswitch-meta-all package pulls in FreeSWITCH plus the standard set of official modules. It can be a large install, so this step may take a few minutes.
Step 8 — Enable and start FreeSWITCH
The package install includes a systemd service. Enable and start FreeSWITCH:
systemctl enable --now freeswitchIf the service fails to start, check the logs:
journalctl -u freeswitch -eYou can also follow the logs live:
journalctl -u freeswitch -fStep 9 — Verify the installation
Check the service status:
systemctl status freeswitchOpen the FreeSWITCH CLI:
fs_cliInside fs_cli, run:
statusYou should see the running FreeSWITCH version, uptime, session counts, and other runtime details. To exit fs_cli, type /exit or press Ctrl+D.
Useful Information
- Service status: systemctl status freeswitch
- Interactive CLI: fs_cli
- Config directory: /etc/freeswitch
- Logs: journalctl -u freeswitch
- Apt auth file: /etc/apt/auth.conf.d/signalwire.conf
- Apt source file: /etc/apt/sources.list.d/freeswitch.list
Prefer a one-shot script?
If you’d rather not run the commands manually, my repo includes a helper script named install-freeswitch-token.sh.
https://github.com/thevoiceguy/freeswitch_tools
Make it executable:
chmod +x install-freeswitch-token.shRun it with your SignalWire PAT:
sudo TOKEN=pt_xxxxxxxxxxxx ./install-freeswitch-token.shOr pass the token as the first argument:
sudo ./install-freeswitch-token.sh pt_xxxxxxxxxxxxThe script automates the same process covered above:
- Installs the required apt tools.
- Detects the Debian codename.
- Downloads the SignalWire repository signing key.
- Configures apt authentication using your PAT.
- Adds the SignalWire FreeSWITCH repository.
- Installs freeswitch-meta-all.
- Enables and starts the FreeSWITCH service.
- Verifies that fs_cli is available.
Installing FreeSWITCH from Source
Compiling FreeSWITCH from source takes longer than the binary method, but it gives you full control over which modules are built, lets you pin a specific version, and avoids the SignalWire token requirement entirely. This is the right approach if you want to customize the build, run a version that isn’t in the binary repo, or simply prefer building critical infrastructure from source.
This guide targets Debian 12 and Ubuntu 22.04 / 24.04. We’ll build FreeSWITCH v1.10.12, but you can swap in any tagged version.
⚠️ Compiling takes time. On a modest VM, expect 20–40 minutes for the full build. On a beefier box with lots of cores, expect closer to 10 minutes.
Step 1 — Become root
All the build steps require root privileges. Open a root shell:
sudo -iStep 2 — Set up your build variables
These are few variables used throughout the guide. Setting them once keeps the commands clean:
FS_VERSION=v1.10.12
BUILD_DIR=/usr/src
PREFIX=/usr/local/freeswitch
JOBS=$(nproc)- FS_VERSION is the FreeSWITCH git tag to build. v1.10.12 is the current stable release at the time of writing.
- BUILD_DIR is where source trees will live.
- PREFIX is where the compiled FreeSWITCH will be installed.
- JOBS tells make how many parallel build jobs to run. $(nproc) uses all available CPU cores.
Step 3 — Install build dependencies
FreeSWITCH has a long list of build-time dependencies — compilers, autotools, and the development headers for every codec and library it can link against. Install them all in one shot:
export DEBIAN_FRONTEND=noninteractive
apt-get update
apt-get install -y --no-install-recommends \
  git build-essential cmake automake autoconf libtool libtool-bin pkg-config \
  ca-certificates wget unzip uuid-dev \
  libssl-dev zlib1g-dev libdb-dev libsqlite3-dev libcurl4-openssl-dev \
  libpcre3-dev libspeex-dev libspeexdsp-dev libldns-dev libedit-dev \
  libtiff-dev libjpeg-dev libopus-dev libsndfile1-dev libavformat-dev \
  libswscale-dev libswresample-dev libpq-dev liblua5.2-dev \
  yasm nasm
This pulls in roughly 300 MB of packages, so give it a minute.
Step 4 — Build libks
libks is a SignalWire-maintained foundational library that FreeSWITCH depends on. Clone it, build it, and install it into /usr so the rest of the build can find it:
cd "$BUILD_DIR"
git clone https://github.com/signalwire/libks.git || true
cd libks
git pull --ff-only
cmake . -DCMAKE_INSTALL_PREFIX=/usr
make -j"$JOBS"
make install
The || true on the clone lets you re-run the script safely if the directory already exists.
Step 5 — Build sofia-sip
sofia-sip is the SIP stack FreeSWITCH uses for all SIP signaling. Build it the same way:
cd "$BUILD_DIR"
git clone https://github.com/freeswitch/sofia-sip.git || true
cd sofia-sip
git pull --ff-only
./bootstrap.sh
./configure --prefix=/usr
make -j"$JOBS"
make install
Step 6 — Build spandsp (pinned)
spandsp handles DSP tasks like fax, DTMF, and tone generation. There’s a catch here: in June 2023, spandsp’s upstream renamed some V18 mode constants and changed the v18_init() function signature. FreeSWITCH 1.10.12’s mod_spandsp was written against the older API and won’t compile against newer spandsp.
The fix is to pin spandsp to the commit immediately before that breaking change:
cd "$BUILD_DIR"
git clone https://github.com/freeswitch/spandsp.git || true
cd spandsp
git fetch --all --tags
git checkout d9681c3747ff4f56b1876557b9f6d894b7e6c18d~1
./bootstrap.sh
./configure --prefix=/usr
make -j"$JOBS"
make install
ldconfig
The ~1 suffix tells git to check out the parent of that commit — in other words, the last commit before the API-breaking change landed.
Step 7 — Clone FreeSWITCH and check out your version
Now for the main event. Clone FreeSWITCH itself and check out the tag you want to build:
cd "$BUILD_DIR"
git clone https://github.com/signalwire/freeswitch.git || true
cd freeswitch
git fetch --tags
git checkout "$FS_VERSION"
Step 8 — Disable mod_signalwire
Before building, disable mod_signalwire. This module connects FreeSWITCH to SignalWire’s cloud platform and requires the proprietary signalwire-client-c library, which is only available from SignalWire’s token-gated repo. If you’re compiling from source, you almost certainly don’t want this module — comment it out:
./bootstrap.sh -j
sed -i 's|^applications/mod_signalwire|#applications/mod_signalwire|' modules.conf
The ./bootstrap.sh -j generates modules.conf (and the rest of the build system), so you need to run it before editing the file.
Step 9 — Configure and build FreeSWITCH
Configure the build with your chosen prefix and PostgreSQL support, then compile:
./configure --prefix="$PREFIX" \
  --enable-core-pgsql-support \
  --disable-dependency-tracking
make -j"$JOBS"
make install
This is the long step. Grab a coffee, go for a walk, or just watch the compiler output scroll by.
Step 10 — Install default sounds and music-on-hold
FreeSWITCH ships with a large library of prompts and hold music. Install the default 8 kHz sounds (good enough for most telephony use) and the default music-on-hold tracks:
make cd-sounds-install cd-moh-install
ldconfig
If you want higher-quality 16 kHz, 32 kHz, or 48 kHz sound packs, you can run make hd-sounds-install, make uhd-sounds-install, or make cd-sounds-install variants with different rates — but 8 kHz is the safe default.
Step 11 — Create the freeswitch user and fix ownership
Running FreeSWITCH as root is a bad idea. Create a dedicated system user and hand over ownership of the install directory:
id -u freeswitch >/dev/null 2>&1 || useradd --system --home "$PREFIX" --shell /sbin/nologin freeswitch
chown -R freeswitch:freeswitch "$PREFIX"
The id check makes this safe to re-run — it won’t fail if the user already exists.
Step 12 — Create a systemd service
The source install doesn’t ship a systemd unit, so we’ll create one. This unit runs FreeSWITCH as the freeswitch user with the ulimits it expects (large file descriptor limits, unlimited core dumps, real-time scheduling):
cat >/etc/systemd/system/freeswitch.service <<EOF
[Unit]
Description=FreeSWITCH Telephony Platform
After=network-online.target
Wants=network-online.target

[Service]
Type=forking
User=freeswitch
Group=freeswitch
LimitCORE=infinity
LimitNOFILE=100000
LimitNPROC=60000
LimitSTACK=250000
LimitRTPRIO=infinity
LimitRTTIME=7000000
ExecStart=${PREFIX}/bin/freeswitch -ncwait -nonat
ExecReload=${PREFIX}/bin/fs_cli -x reloadxml
Restart=on-failure
RestartSec=5

[Install]
WantedBy=multi-user.target
EOF
Reload systemd, then enable and start the service:
systemctl daemon-reload
systemctl enable --now freeswitch
Step 13 — Add convenience symlinks
Because FreeSWITCH is installed under /usr/local/freeswitch/bin, those binaries aren’t on your PATH by default. Link them into /usr/local/bin so you can run freeswitch and fs_cli from anywhere:
ln -sf "$PREFIX/bin/freeswitch" /usr/local/bin/freeswitch
ln -sf "$PREFIX/bin/fs_cli"     /usr/local/bin/fs_cli
Step 14 — Verify the installation
Check the service is running:
systemctl status freeswitchOpen the FreeSWITCH CLI:
fs_cliInside fs_cli, run:
statusYou should see the FreeSWITCH version, uptime, and session counts. To exit, type /exit or press Ctrl+D.
Useful Information
- Install prefix: /usr/local/freeswitch
- Config directory: /usr/local/freeswitch/conf
- Logs: /usr/local/freeswitch/log (or journalctl -u freeswitch)
- Service unit: /etc/systemd/system/freeswitch.service
- Source trees: /usr/src/{libks,sofia-sip,spandsp,freeswitch}
Prefer a one-shot script?
Everything above is bundled into a helper script in my GitHub repo named install-freeswitch.sh.
https://github.com/thevoiceguy/freeswitch_tools
Make it executable:
chmod +x install-freeswitch.shRun it with the default version (v1.10.12):
sudo ./install-freeswitch.shOr specify a different FreeSWITCH version:
sudo ./install-freeswitch.sh v1.10.11The script automates the entire process covered above:
- Verifies you’re running as root on Debian or Ubuntu.
- Installs all build dependencies.
- Clones and builds libks.
- Clones and builds sofia-sip.
- Clones and builds spandsp (pinned to a compatible commit).
- Clones FreeSWITCH and checks out the chosen version.
- Disables mod_signalwire.
- Configures, compiles, and installs FreeSWITCH.
- Installs default sounds and music-on-hold.
- Creates the FreeSWITCH system user.
- Writes and enables a systemd service.
- Adds convenience symlinks for FreeSwitch and fs_cli.
Nice tutorial and scripts . Thank you for your efforts!
After 10+ years running a solid FreeSWITCH setup for home use on a Pi 3 , I am making an attempt to move to FS 1.10 from 1.07 on Debian 13 from Debian 11
I am building again from source but got stuck at configuring the build parameters:
libpcre3 has been superseded by libpcre2 (strange designation change).
Running ./configure , obviously libpcre cannot be found.
Any suggestion how to overcome this issue or should I use Debian 12
Thanks. Peter
Hi Peter, for the scripts I provided, I’m using Debian 12 (Bookworm). As of the writing, binary packages do not exist for Debian 13 (Trixie). However with that said, FreeSWITCH released v1.11 about 3 weeks ago and version 1.11 now supports Trixie! The PCRE version in 1.10 wasn’t compatible with Trixie causing the build errors but this has been addressed in 1.11. I’d use 1.11 going forward instead of 1.10. https://github.com/signalwire/freeswitch/releases
Thanks for your suggestion, James!
Compiling FS 1.11 , running Debian 13 is a breeze 🙂
You could streamline your 1.10 install script for this new release.
I only modified the systemd unit file to my liking and also had to resolve a permissions issue running the service as a freeswitch user. Now everything is sweet with my simple FS setup
I
Thank you for all your high quality posts , written with passion.
Your series about building a voice ai agent with low latency is fascinating, but a bit out of out of my league.
BTW just delete my comment or parts of it, if you believe it is not relevant or beneficial to this article